3 Must-have JupyterLab 2.0 extensions
JupyterLab just became a full-fledged IDE with features like Code Assistance, Debugging and Git — welcome to the future of Notebook editing.

I am happy to confirm that JupyterLab just became a full-fledged IDE with the help of the latest extensions. A week ago, I mentioned a couple of deficiencies that I notice while editing Notebooks with JupyterLab — nonexistent code assistance was one of them.
Soon after one of the lead developers of JupyterLab-LSP contacted me and showed me their extension. I gave it a try — it is a massive improvement in the Jupyter ecosystem.
There were still a couple of missing pieces in the JupyterLab ecosystem to make it at least equivalent to PyCharm in terms of features. But not anymore.
Here are a few links that might interest you:
- Labeling and Data Engineering for Conversational AI and Analytics- Data Science for Business Leaders [Course]- Intro to Machine Learning with PyTorch [Course]- Become a Growth Product Manager [Course]- Deep Learning (Adaptive Computation and ML series) [Ebook]- Free skill tests for Data Scientists & Machine Learning Engineers
Some of the links above are affiliate links and if you go through them to make a purchase I’ll earn a commission. Keep in mind that I link courses because of their quality and not because of the commission I receive from your purchases.
In case you’ve missed my previous articles related to this topic:
JupyterLab-LSP
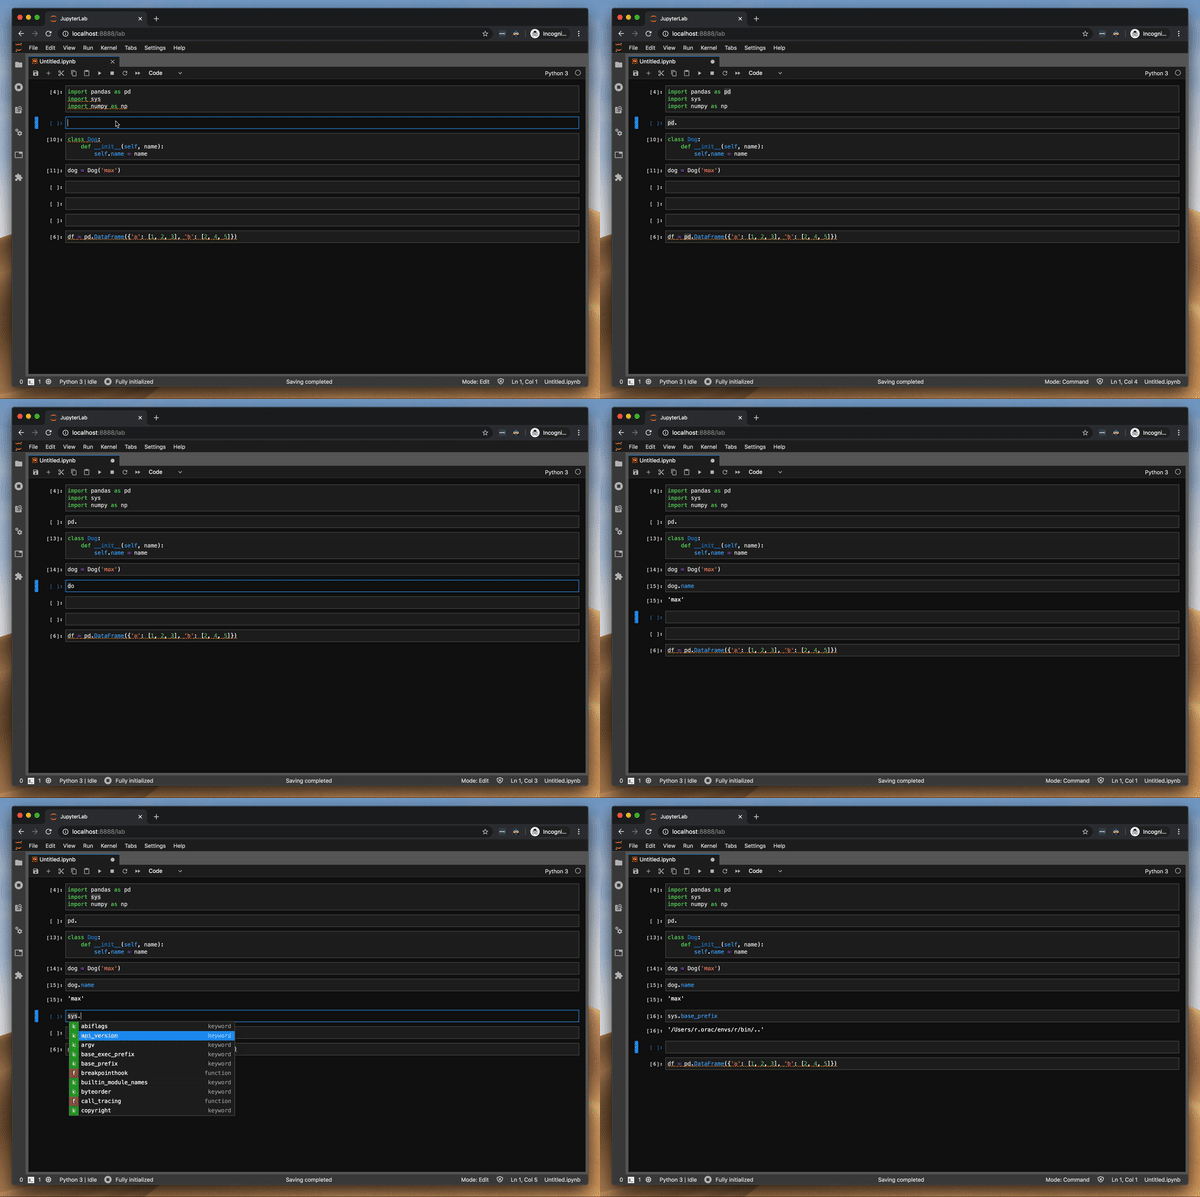
JupyterLab-LSP adds code assistance capabilities to JupyterLab. Read JupyterLab 2.0. to learn more about it:
Debugger
I used to do debugging in JupyterLab with pdb package — it was a painful process. A few days ago, I heard about a new debugging extension and I was really intrigued to give it a try:
A proper debugger is one of the last missing pieces in the JupyterLab ecosystem. All praise to the developers of the latest JupyterLab extensions — install works on a first try, well-written documentation, etc. It was no different with the debugger extension. Note, that debugger supports only JupyterLab ≥ 2.0 and it is still under active development.
How to enable the debugger?
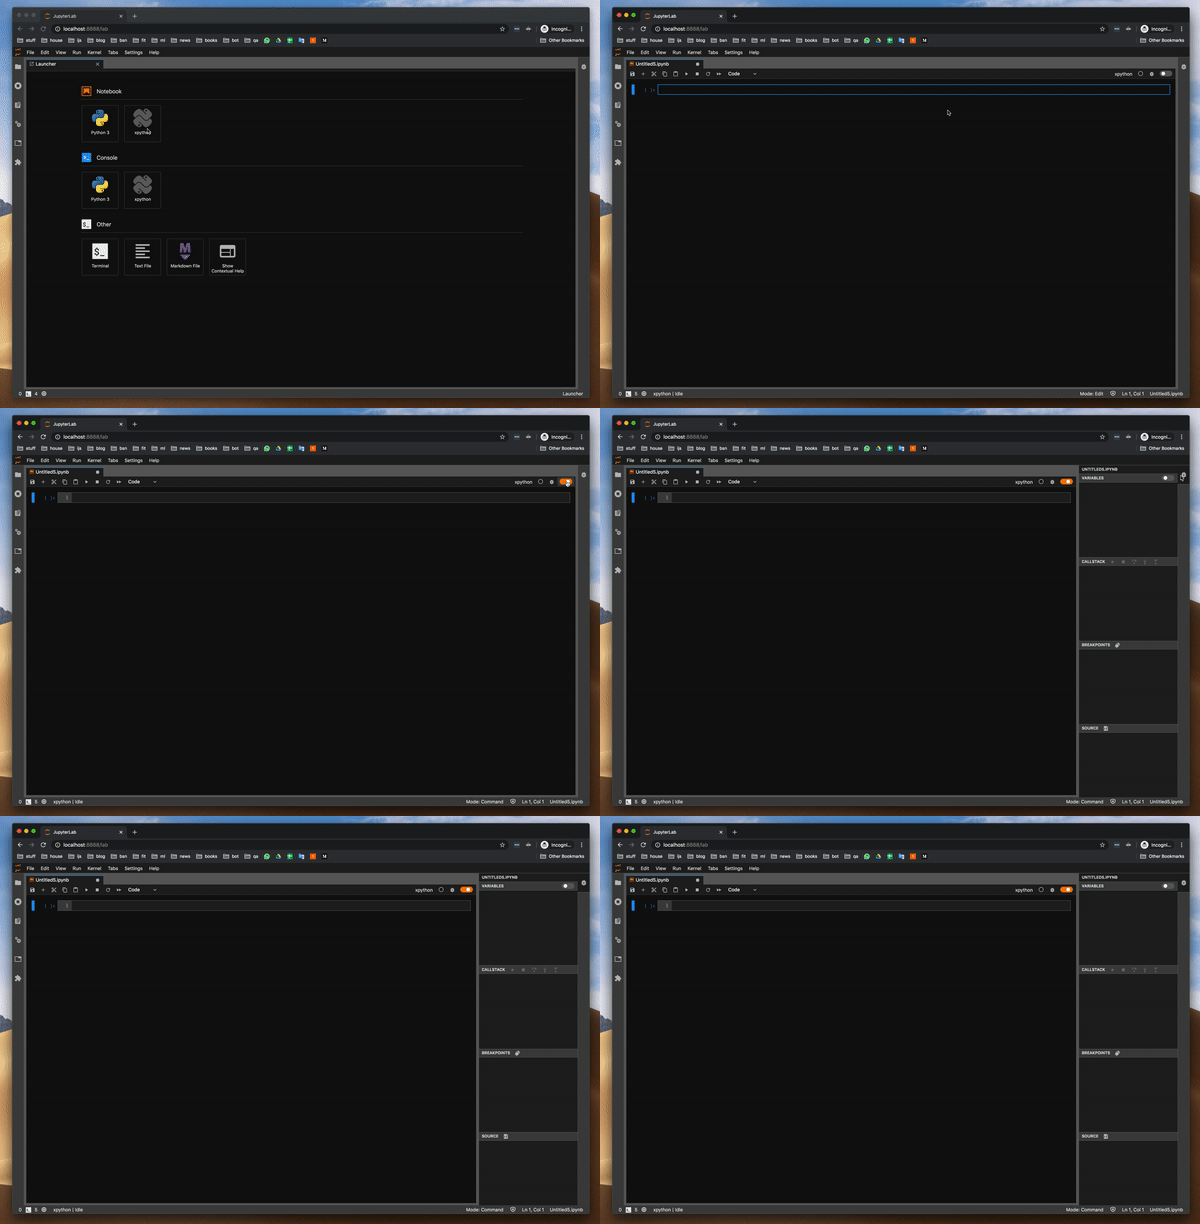
The debugger works in xpython Notebook — x is short for xeus, which is a library meant to facilitate the implementation of kernels for Jupyter. It takes the burden of implementing the Jupyter Kernel protocol so developers can focus on implementing the interpreter part of the kernel.
How to use the debugger?
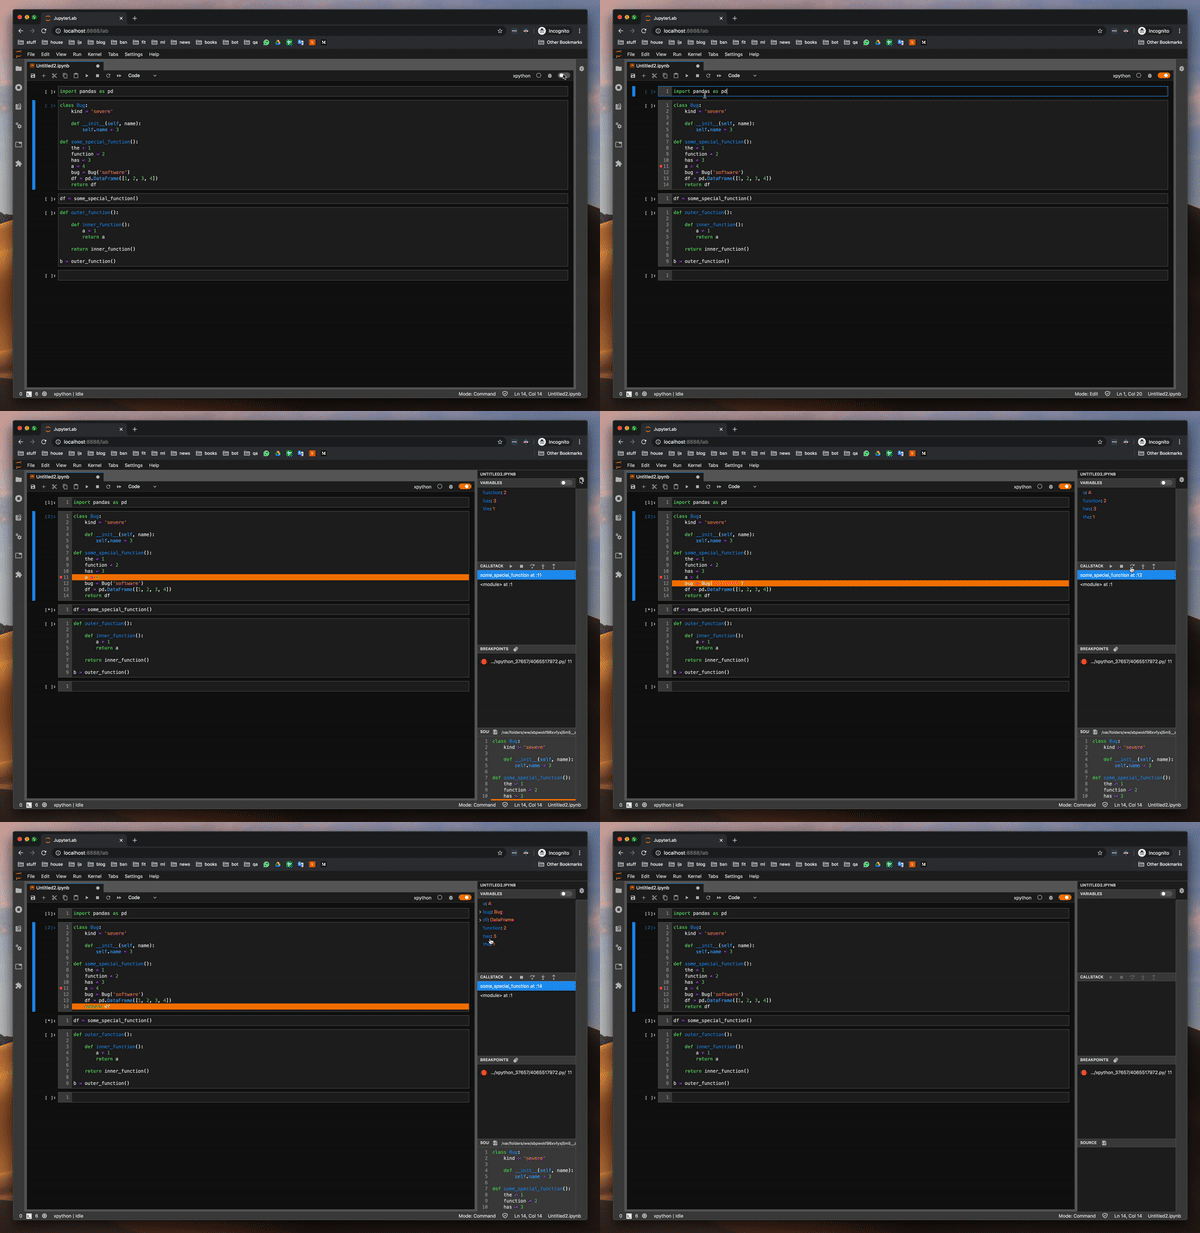
I tried the debugger by investigating the values of variables in a function — this was the biggest pain point when using pdb package — and it works well. I also tried to investigate the values of a class and a DataFrame. It all works flawlessly.
How to install it?
Make sure you have JupyterLab ≥ 2.0 installed and Extension Manager enabled. Then install requirements:
pip install xeus-python==0.7.1
pip install ptvsd
To install the extension, run:
jupyter labextension install @jupyterlab/debugger
JupyterLab-Git
If you’ve ever pushed a Jupyter Notebook to Git, then made some changes to it and pushed it again, you know that Git’s diff functionality is useless — it marks everything. I used a workaround by resetting all outputs before pushing it, but sometimes I forgot (or JupyterLab didn’t save the latest state) and there was a big mess in the end. I am really excited about this one. Will it meet my expectations?
Let’s try it
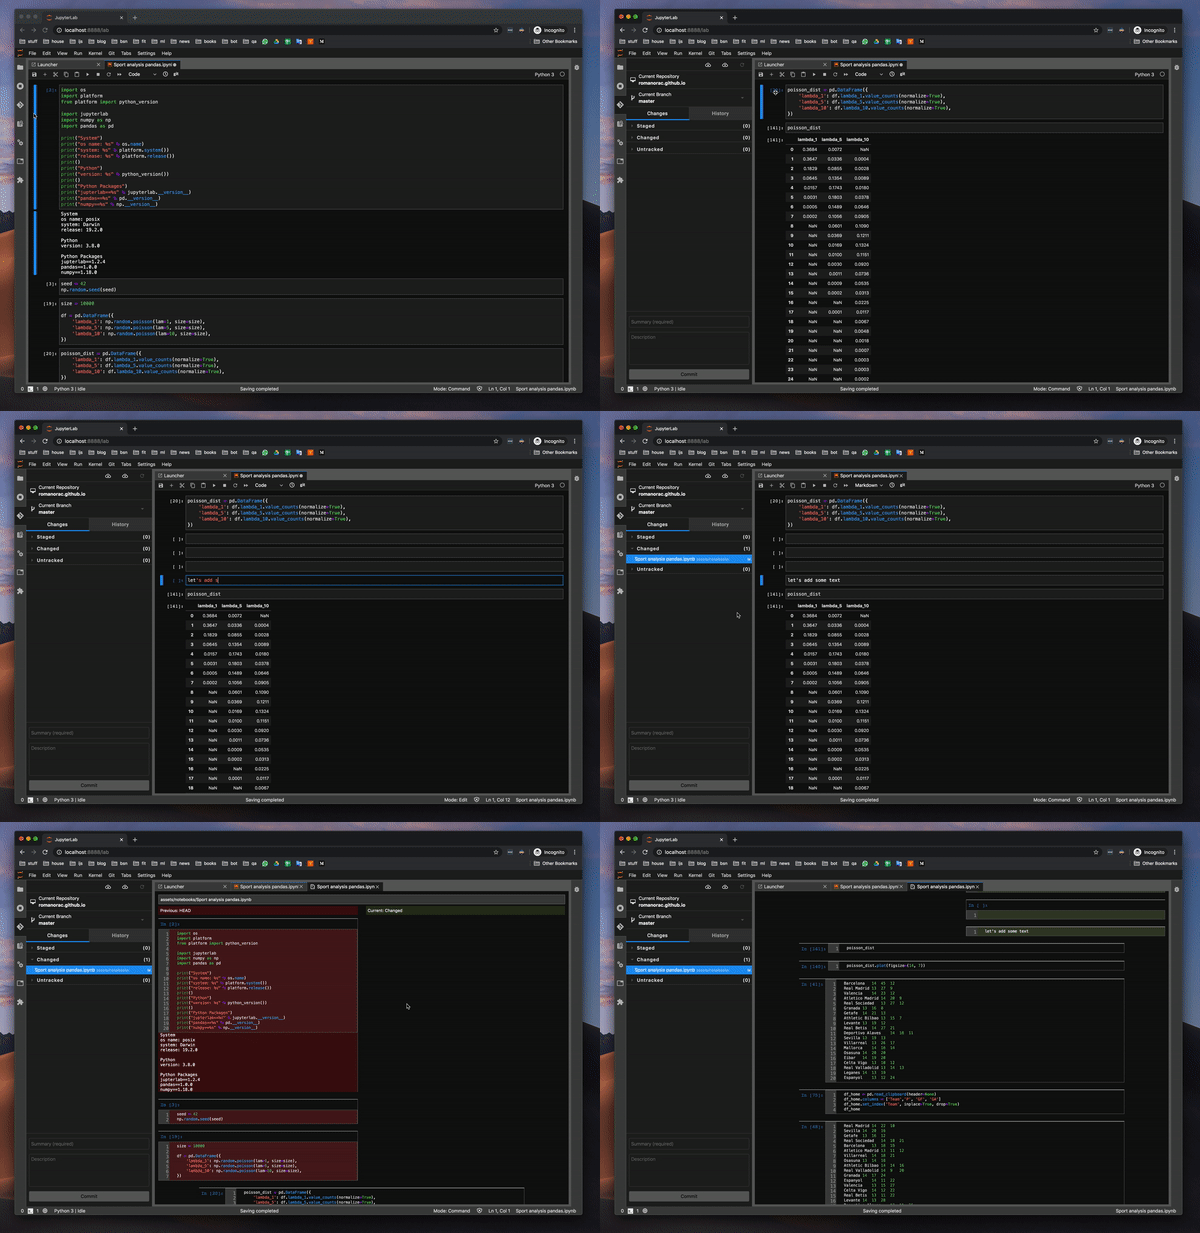
Wow, I was really amazed by this one. I made a few changes in the Notebook and the diff functionality really works well. Kudos to the jupyterlab-git team.
Tip: When reverting changes in a Notebook , first close the Notebook, then use revert. It works better
Commit history
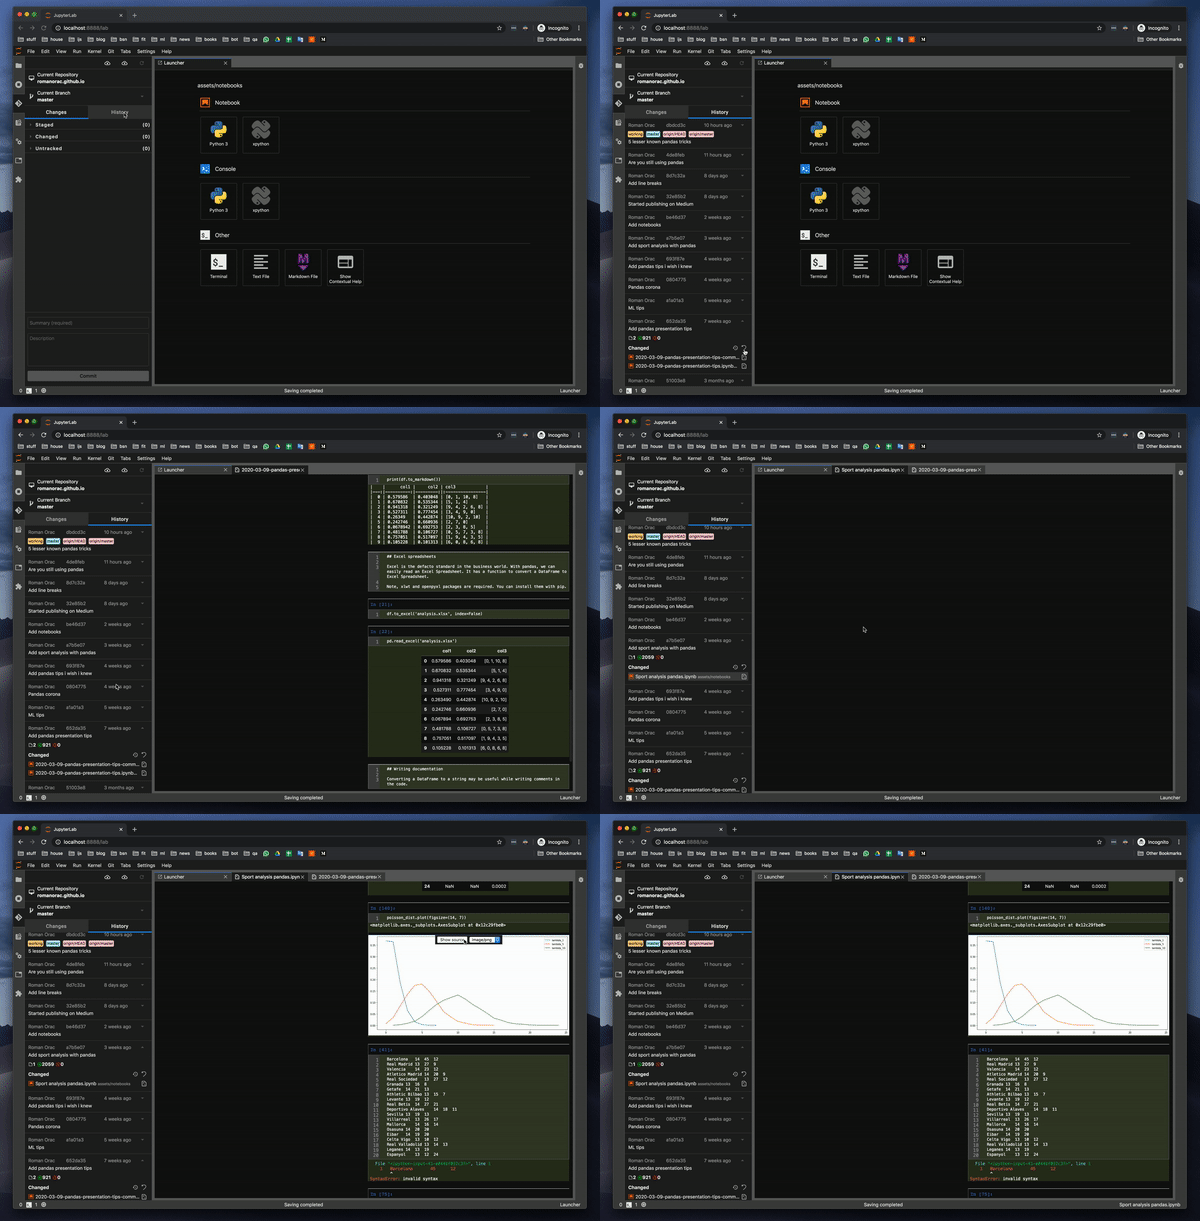
You can observe commit history — this is a killer feature. It even shows images. You can finally observe what a coworker had changed without going through the whole Notebook.
How to install it?
Make sure you have JupyterLab ≥ 2.0 installed and Extension Manager enabled. Then run:
pip install --upgrade jupyterlab-git
jupyter lab build
After installing it, Extension Manager showed that packages are outdated so I’ve clicked update, waited some time, confirmed the rebuild and restarted the jupyter-lab. Then it worked!
Conclusion
Like I’ve mentioned in my previous articles about JupyterLab — the future of Notebook editing is bright ☀️ I’m going to switch over to JupyterLab 2.x when vim extension and code formatter extensions become available. Until then I going to stick will JupyterLab 1.2.
Before you go
Follow me on Twitter, where I regularly tweet about Data Science and Machine Learning.
