
Using Binder Repos to deploy notebooks
Deploy Your Jupyter Notebooks the Easy Way — Python Edition
Get your Jupyter notebooks running on someone else’s machine in 7 easy steps
Intro
In this article I going to help you never say —
“But…it worked on my laptop 😥” ever again.
I’ll show you how to deploy your notebooks in 7 easy steps 😄.
Picture this. You’ve spent time building an awesome machine learning pipeline in a Jupyter notebook. It runs end to end on your computer, and now you want to share it with your boss or LinkedIn network to show how awesome you are.
“This is the easy part”, you say to yourself naively.
“I’ll just attach this to an email or post a link to a GitHub repository holding the notebook and….voila”.
If you’ve ever been in this situation, you’ll know the frustrations of trying to share your work.
The list of likely complications you would have faced are:
😡 The code in the notebook errors due to library dependencies.
😡 The user is not able to interact with the notebook.
😡 The data used in the notebook is sat on your local machine.
The good news is there is actually an amazingly simple (and free) way to deploy your Jupyter notebooks and avoid all of these common issues. And, you don’t have to be a software engineering whiz either.
👍We can deploy our notebooks with Binder Repositories.
Before getting into the details, let’s talk briefly about binder repositories.
What is a Binder Repository?
A Binder is a code repository that contains at minimum two elements:
☑️Code or content that you want people to be able to run. For our purposes this will be a Jupyter notebook
☑️ Configuration files for the environment. These are used by the binder to build the environment required for the code to run.
The great thing is there are online, open source, binder repo services that make deploying your Jupyter notebooks easy.
For this tutorial we will be using My Binder. An easy-to-use service that is maintained by the Binder community, serving as both a binder service and a demonstration of the BinderHub tech.
Let’s get started!
Pre-requisites
This tutorial is focused on deploying python based Jupyter notebooks. Therefore, I’ll assume the reader is already familiar with Jupyter notebooks.
You’ll need a GitHub account to store your project, including any csv/data used. If you don’t have a GitHub account, you should create one before proceeding.
Deploy Your Notebook
I have created a small Jupyter notebook that plots some data for our deployment tutorial. I’ll make this available on GitHub.
Step 1 — Create a GitHub repository to hold the projects, you can name your GitHub repo as you like.
I’ve called mine “deploy_notebook_example” (…very creative, I know).
Step 2 — Create a Jupyter notebook with the following code:
The first piece of code is a function that reads CSV files from a GitHub repository. You’ll need to change the url to the location of your data files in your repository.
Step 3 — Create a requirements text file and upload to GitHub.
This file contains all the library dependencies for your Jupyter notebook. It’s how the Binder will know what libraries to install to recreate the environment needed for your notebook to run smoothly on someone else’s machine.
The easiest way to do this is by running “pip freeze” in your Jupyter notebook. This will show you all the libraries installed in your environment. Simply copy and paste the libraries you have used in your notebook into a notepad and save as “requirements”.
Note it’s important that the libraries include the version too.
If done correctly, your requirements file should look like this:
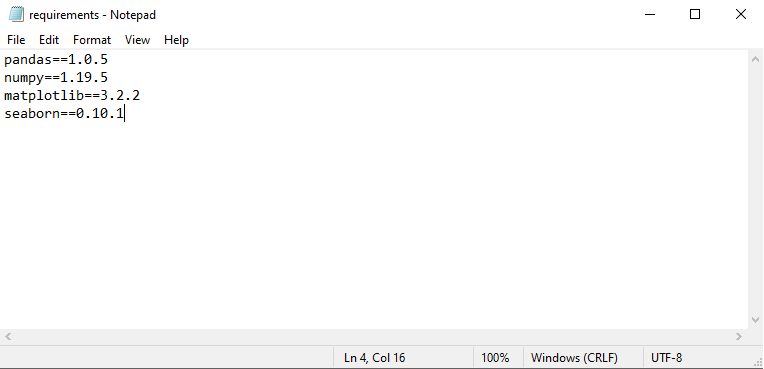
⭐You should only copy the libraries you have imported to the notebook!
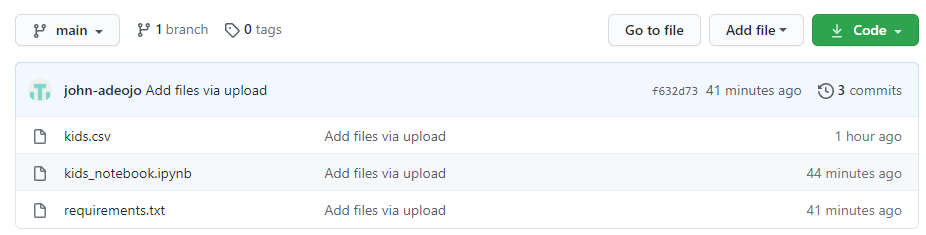
Step 4 — Upload your Jupyter notebook, your csv file, and your requirements text file to your GitHub repo.
Your GitHub repo should look something like this.
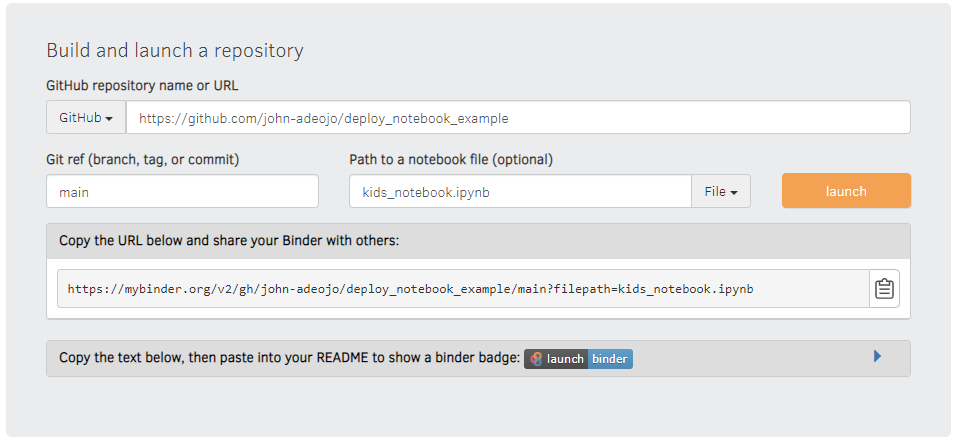
Step 5 — Got to My Binder
Paste the GitHub URL for your repository containing the project into the window.
Where it says Git ref type in main.
Where it says path to notebook type in the notebook file name. You can get the notebook file name by clicking on the notebook in your GitHub repository and copying the file path.
Once this is done simply hit the launch button. My Binder will construct your binder repo in a few minutes.
Once built, you can share the link to this with anybody you want to run your project on their machine.
🚀 Grab your link by clicking the binder button!
Step 6 — Grab your Binder link and share it with the world!
Step 7 — Celebrate
See that was easy, and hopefully you’ll never have to say “But…it worked on my laptop” ever again.
🌈 If you found this helpful, please leave some feedback or share with a friend who wants to showcase their Jupyter notebook.
Thanks